Exploring digital art with CSS-only
Let’s start with what CSS-only means. It’s exactly what it sounds like, making things appear in a browser using nothing but HTML divs and CSS. So no code, no libraries, no dependencies, super easy right?
Now obviously I’m not talking about fully functioning web applications (though I have seen some mocked out to an incredible degree). Most CSS-only codepens and projects out there are self imposed challenges and art projects, and as a Front-end developer and an artist this is something I’ve always wanted to try.
CSS has always stuck out as my favourite part about front end development but after so many implementations of copy and pasting pre-made components into a template and adjusting with flex box things start to feel a little lacklustre. While I like spending my time watching videos on cool and handy CSS tricks, I find I don’t ever really need them in my world of logic heavy simple UI based web application building.
So what is there to do about that? Go in the completely opposite direction, remove the logic, dispense with the clever and efficient “little CSS as possible” mentality, pick something to create and see what shakes out 😎
Motivation
Before I dive into the CSS portion of this I would like to take a quick second to explain what fuelled my motivation to finally take a stab at one of these projects.
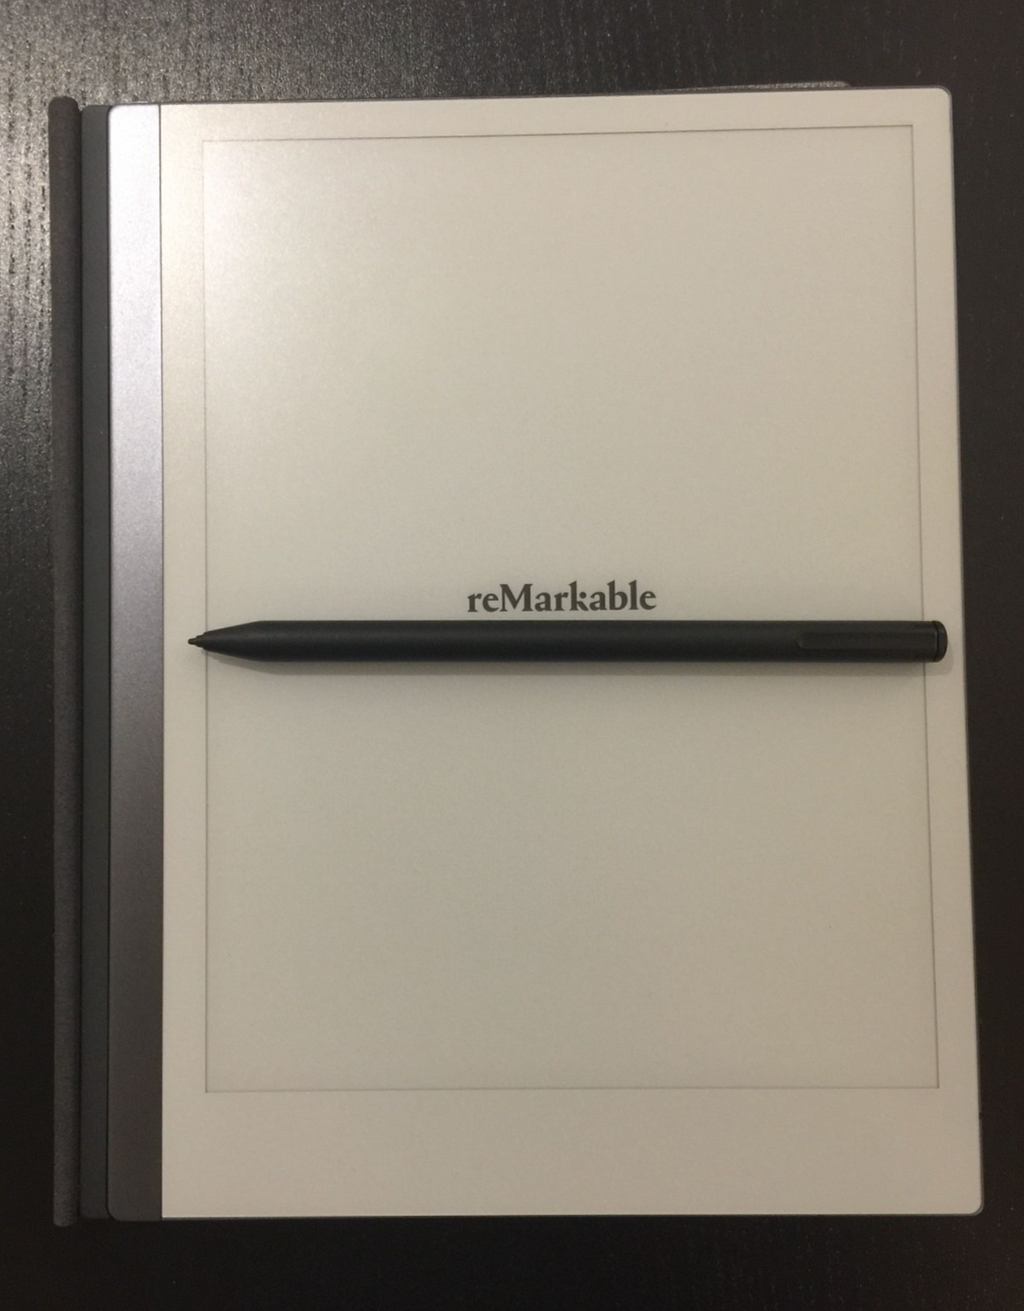
It started with one of these. The reMarkable2. I recently bought one for work to consolidate the billion and a half notes and to do list I create, so far so good on using it for its purpose, but it didn’t take long for me to take it home to see what kind of art I could create with it (same day if we are being honest with each other).
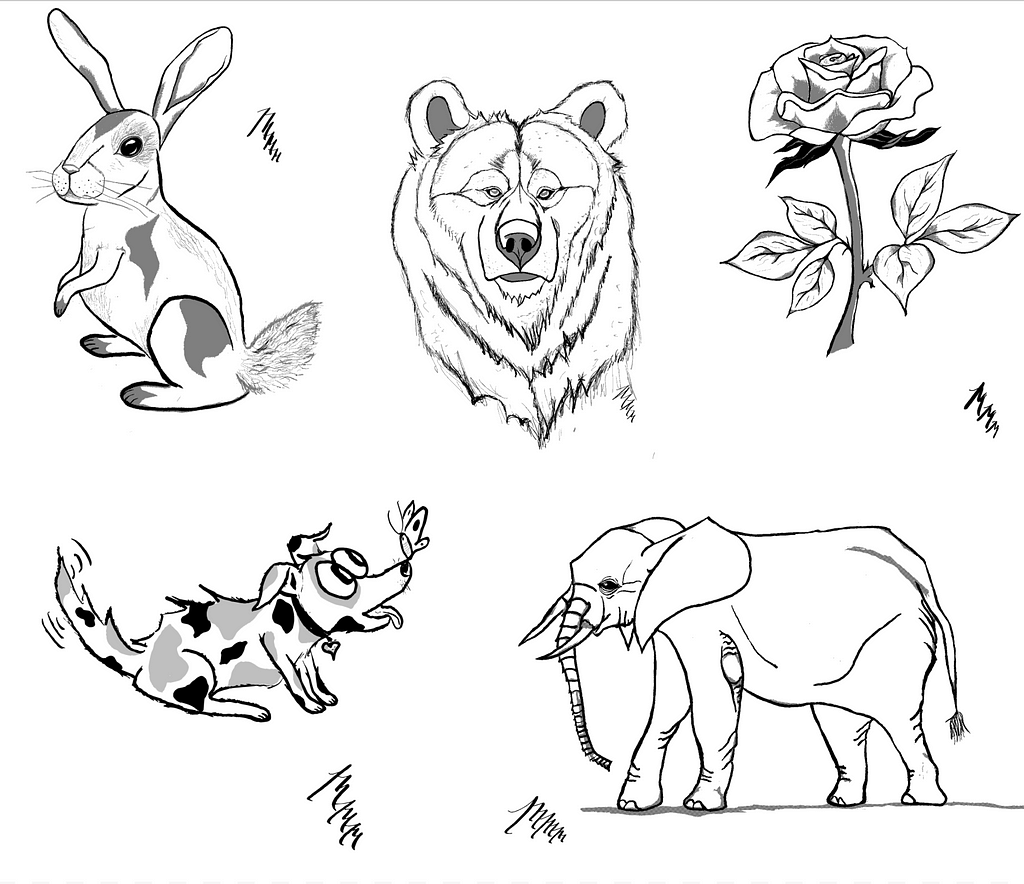
So I made what I consider some pretty things in gray-scale with my only thought being “isn’t this just a slightly ridiculous medium for art ?”(pun not intended). Then I remember stumbling across a CSS-only art gallery online and thought “that must surely be a more ridiculous medium for art ”(pun fully intended).
So what better way to explore ridiculousness than porting over a reMarkable sketch into pure CSS and see which one is more ridiculous.
So how is this gonna work? I’ll walk you through my process for both the sketch and the CSS since my final product was a blend of techniques borrowed from each world.
Processes
For the reMarkable sketch, the process is pretty straightforward and just like a pen and paper sketch. You can try it out yourself here if you are so inclined:
http://www.supercoloring.com/drawing-tutorials/how-to-draw-a-realistic-giraffe
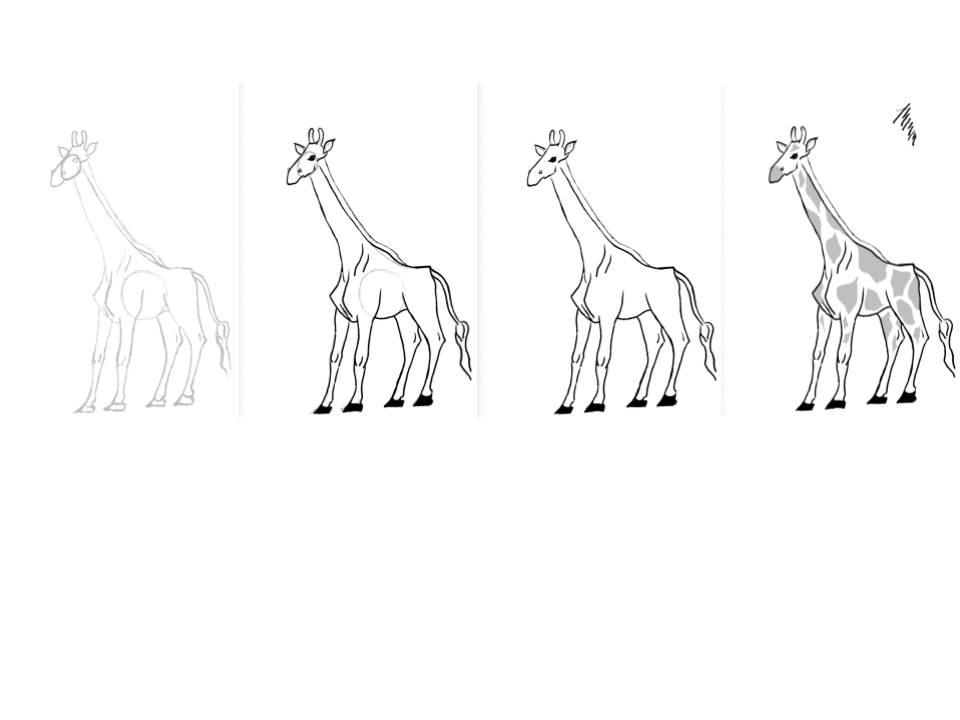
Construction objects are used to aid a rough construction outline. The construction outline is traced over with a strong outline and the construction lines are then removed (this is actually super dope in remarkable since anything erased gets sent to an unknown dimension as opposed to becoming a gray smudge on your beautiful drawing).
Last is adding the details. Normally I would incorporate fine lines, shading, and texture but since this is in fact my first rodeo into pure CSS art I opted for the “hard pass” option on those.
The entire process took me about 45 minutes.
Now. My CSS process is a different beast altogether (but still a giraffe) and simply stated took longer 45 minutes, by a bit.
Overall I mainly used border-radius properties on my divs while making any number of the sides transparent to achieve curved lines. In addition I added rotate and scale transform properties to almost everything for quick adjustments.
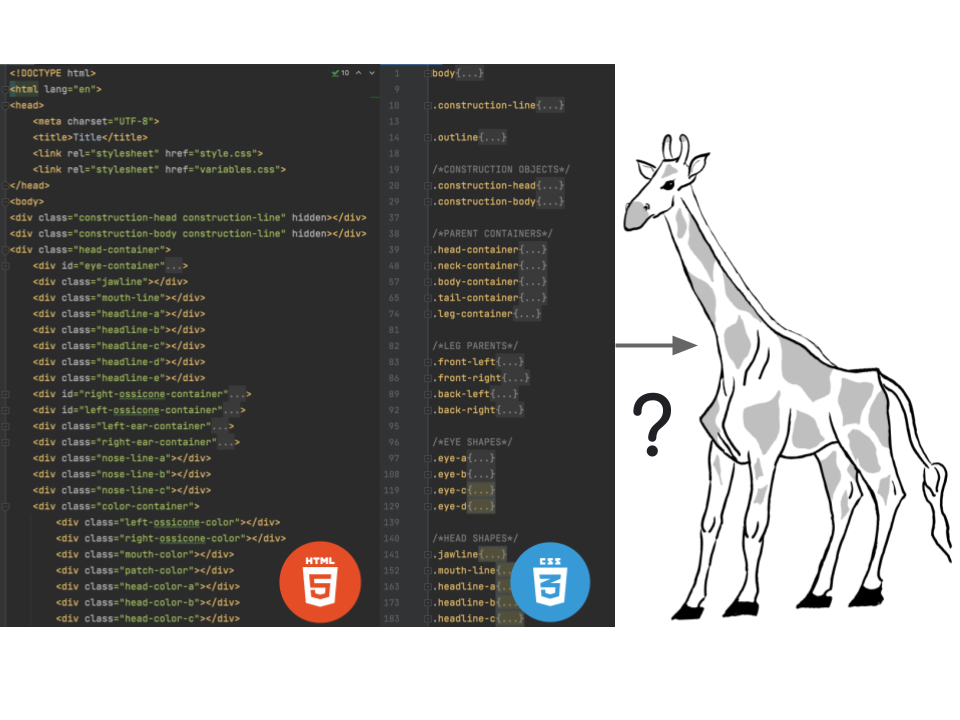
Most of my CSS selectors ended up looking like the one below. Definitely a verbose approach but if I am going to end up having hundreds of lines of CSS anyway i’d rather it be clear than clever, but that’s just me.

Upon first glance I determined I would have to make upwards of 60 of these lines to fully port over my sketch. For some reason I continued with the project and set out to find a way to organize all of these lines.
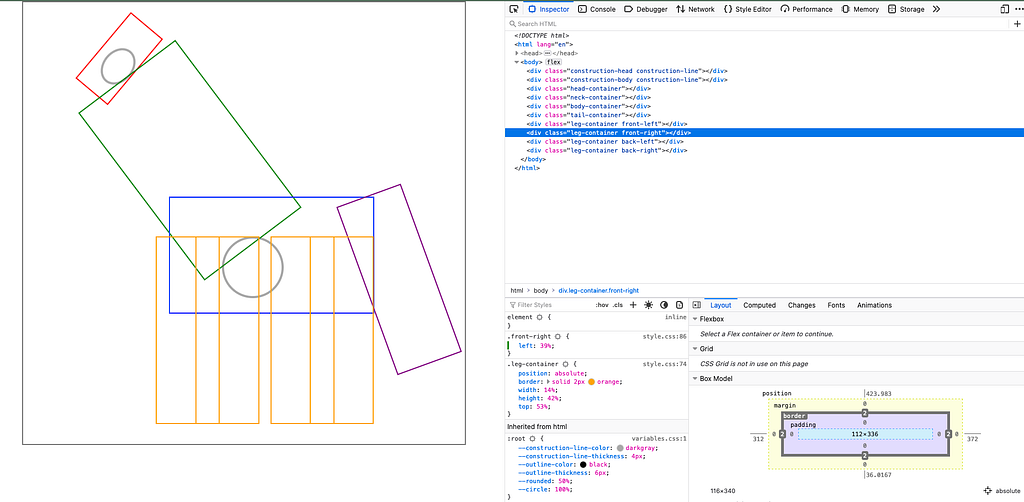
The overall idea was to construct nested divs with highest level parents being containers for the head, neck, body, tail, and one for each leg of the giraffe.
We don’t need a full construction outline like the sketch but I thought it was worth it to include the initial constructions objects so I could place things relatively where I wanted them in order to avoid a bunch of tiny corrections later on.
Getting to it
I will provide a few examples and explanations of how I created the giraffe’s head, and after that we will skip to the end, because like some art out there, after the initial tools and techniques are figured out, the remaining 90% of the project is just repetition until completion.

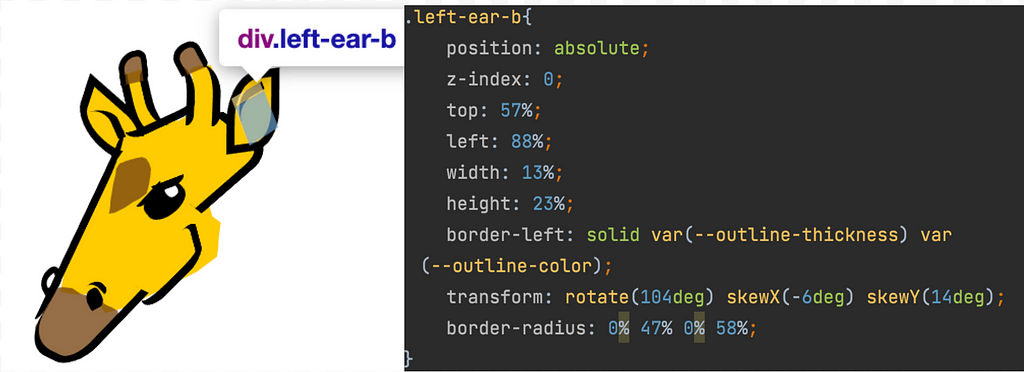
As I said before I stuck to using the second technique to create curved lines and simply used transformations and rotations on the lines themselves and the parent containers to essentially play a very strange game of “connect the dots”.
For the giraffes spots and to color everything I used this excellent tool to create custom polygon clip paths for the divs:
https://bennettfeely.com/clippy/
Just an FYI, you could probably make a lot of curved lines and strange shapes with this tool but you need to keep in mind you can not rely on using the border property to outline the shape.
With this you are cropping a strange shape out of a rectangular object and you can only see it if you provide a background color. Last caveat, at the time of this writing there is a strange phenomenon in firefox where the outer border of the div is still visible. This is apparently fixable by adding a border radius but I just opted to switch over to chrome for the time being.
I decided to do little to no research before just diving into creating this and my only regret is still not knowing if there is a clever way to deal with curved lines that have inflection points without resorting to using svg.
In the end I needed 20 lines to create the head and an extra 5 divs to color it all in. With a lot of copying and pasting CSS selectors I ended at around 450 lines of CSS but the head is the most involved piece and I anticipate the rest of the body to be much simpler and quicker.
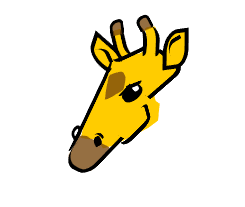
The end result is one slightly grumpy looking giraffe head but ya know, you’d be pissed if your body was missing as well.
Reflections
So who wins the battle of most ridiculous? Well jokes aside, surely the question itself is the winner.
For me the catharsis of creating is about enjoying the process, and the process is defined by the creator.
I don’t see the difference between typing art into existence or sketching it on paper (digital or not). Same would go for creating photo realistic images with a charcoal pencil or deciding bread and a trusty toaster or hand torch is the way to go (just google “toast art’’ if you don’t understand where i’m going here).
Point is, if you’re trying to find the point, you’ve probably missed it.
If you were to ask me why not just add some code and open the doors to canvas and WebGL, or D3, or three.js, then I would answer “I did this with CSS because I can and because I wanted to”, and i’m not alone in this thought process.
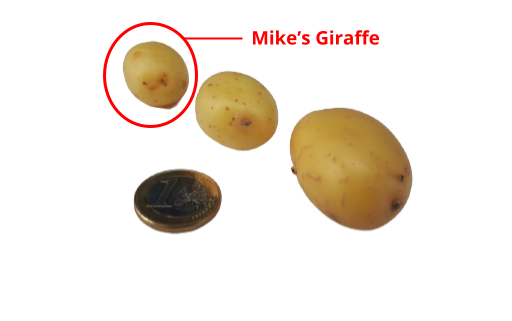
What I’ve shown here is probably the smallest of small potatoes of what can be achieved using only CSS and I encourage you to check out the video that opened my eyes to this, it’s full of people creating crazy and beautiful things.
https://www.youtube.com/watch?v=CG__N4SS1Fc
Now to take a big step away from my artistic musings, there are still some points to be made on the pros and cons between my two “implementations”.
Obviously drawing is going to be faster on something that was made in part for that, like reMarkable, but I can explore much more with my CSS giraffe by means of color and animation.
So let’s throw some more into the mix and create something that you can’t create on a reMarkable or a canvas. Imagine my little giraffe friend here taking a stroll with a setting sun in the background. Sound dope? Well I think so, so that’s what I intend to add to this project to make my potato just a little bit bigger.
For this I will need to add about a million unique CSS animations. This is a much more technical adventure so we will park the art talk and you can join me for part two of this journey where we will start with a finished version of my giraffe friend and do a full tech dive into animations.
Until then, peace, cheers, and happy “coding”! 😎
Exploring digital art with CSS-only was originally published in Grensesnittet on Medium, where people are continuing the conversation by highlighting and responding to this story.